Low battery
Battery level is below 20%. Connect charger soon.


Ford Transit Connect Fuel Filter Change: The Quick DIY Hack Mechanics Don’t Tell You
Tired of paying hefty mechanic bills for a simple fuel filter change on your Ford Transit Connect? You’re not alone. While seemingly complex, replacing your fuel filter is a manageable DIY task that can save you time and money. This guide provides a straightforward approach, including a few “hacks” that can streamline the process, making it quicker and easier than you might think. Let’s get started!
Understanding the Importance of a Fuel Filter Change
Before diving into the how-to, let’s understand why regular fuel filter changes are crucial. Your fuel filter acts as a crucial barrier, preventing contaminants like dirt, rust, and water from reaching your engine’s delicate fuel injectors. A clogged filter restricts fuel flow, leading to:
- Reduced engine performance: Noticeable loss of power and acceleration.
- Poor fuel economy: Your Transit Connect will consume more fuel than usual.
- Rough idling: The engine may run unevenly or stall.
- Difficult starting: The engine might struggle to start, especially in cold weather.
- Engine damage: In severe cases, a completely blocked filter can cause irreparable harm to your engine.
Regular replacement (consult your owner’s manual for recommended intervals) prevents these issues and ensures optimal engine health and performance.
Tools and Materials You’ll Need
Before you begin, gather these essential items:
- New Ford Transit Connect fuel filter: Ensure you purchase the correct filter for your specific year and model.
- Wrench (size may vary depending on your model): To loosen the fuel filter housing.
- Drain pan: To catch spilled fuel.
- Shop rags or paper towels: For cleaning up spills.
- Gloves: To protect your hands from fuel.
- Fuel line disconnect tool (optional but recommended): Makes disconnecting fuel lines much easier and safer.
- Torque wrench (optional but recommended): Ensures proper tightening of the fuel filter housing.
Step-by-Step Fuel Filter Replacement Guide
(Note: Always consult your vehicle’s owner’s manual for specific instructions and safety precautions.)
Safety First: Disconnect the negative terminal from your vehicle’s battery to prevent electrical shorts. Allow the engine to cool completely before starting.
Locate the Fuel Filter: The fuel filter’s location varies slightly depending on the year and model of your Transit Connect. Consult your owner’s manual for precise location. It’s often found under the hood or near the fuel tank.
Release Fuel Pressure: This is a crucial step to prevent fuel spraying. Refer to your owner’s manual for the correct procedure. Some models require running the engine until it stalls after disconnecting the fuel pump relay.
Disconnect Fuel Lines: Carefully disconnect the fuel lines from the fuel filter. Use a fuel line disconnect tool if you have one to avoid damaging the lines. Have your drain pan ready to catch any spilled fuel.
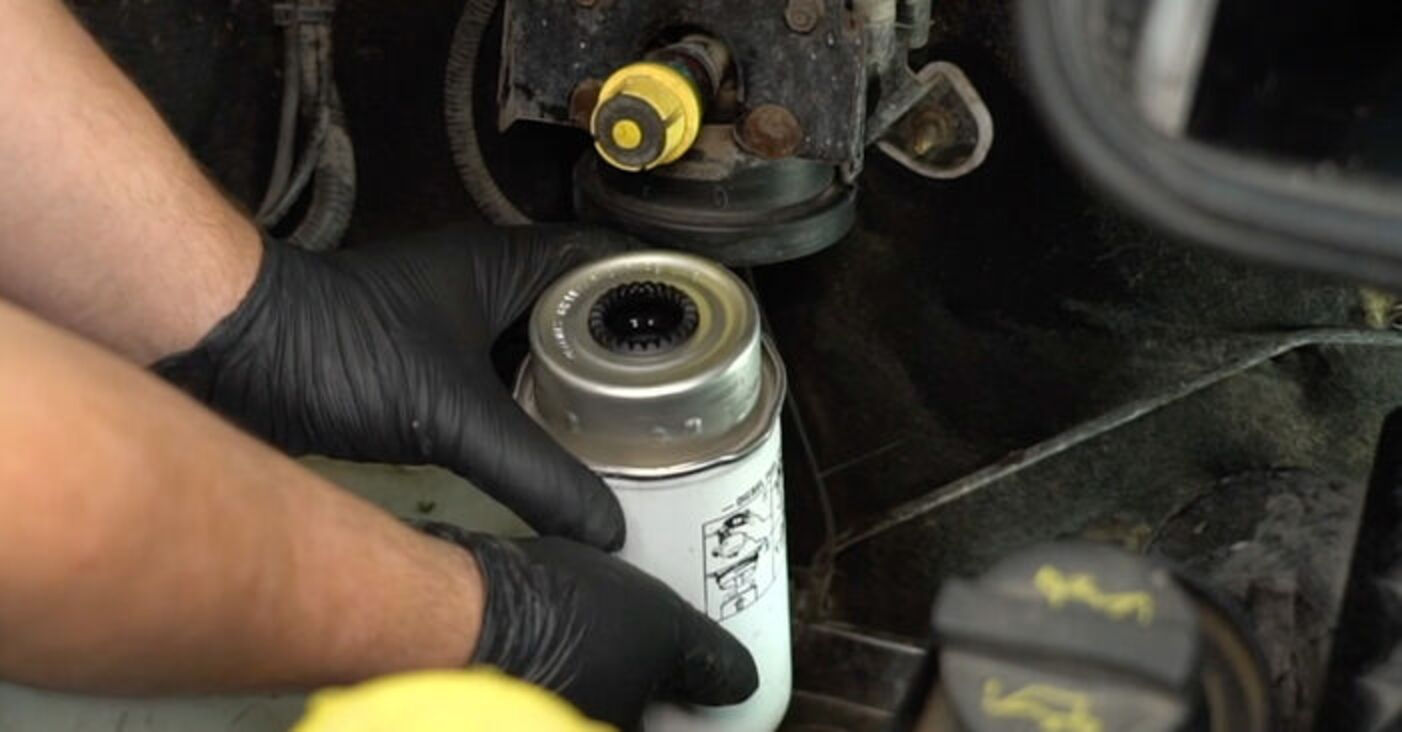
Remove the Fuel Filter Housing: Use the appropriate wrench to carefully loosen and remove the fuel filter housing.
Install the New Fuel Filter: Carefully install the new fuel filter, ensuring the rubber seals are properly seated.
Reconnect Fuel Lines: Reconnect the fuel lines securely, ensuring a tight connection.
Reinstall the Fuel Filter Housing: Tighten the fuel filter housing to the manufacturer’s specified torque (check your owner’s manual).
Reconnect Battery Terminal: Reconnect the negative battery terminal.
Start the Engine: Start the engine and check for any leaks around the fuel filter and lines. Let the engine run for a few minutes to allow the new filter to prime.
The Mechanic’s “Secret”: Pre-Soaking the Filter
This is the “hack” mechanics often don’t share. Before installing the new filter, consider briefly submerging it in clean fuel. This pre-soaking helps prime the filter, reducing the time it takes for the engine to run smoothly after the replacement.
Conclusion
Changing your Ford Transit Connect’s fuel filter is a straightforward DIY task that can save you money and improve your vehicle’s performance. By following these steps and utilizing the pre-soaking tip, you can complete the job quickly and efficiently. Remember to always prioritize safety and consult your owner’s manual for model-specific instructions.
FAQs
Q1: How often should I change my Ford Transit Connect’s fuel filter?
A1: Consult your owner’s manual for the recommended replacement interval. Generally, it’s recommended every 20,000-30,000 miles or annually, whichever comes first.
Q2: What happens if I don’t change my fuel filter?
A2: A clogged fuel filter can lead to reduced engine performance, poor fuel economy, rough idling, difficult starting, and potentially severe engine damage.
Q3: Can I use a generic fuel filter instead of a Ford-branded one?
A3: While generic filters might be cheaper, it’s best to use a filter specifically designed for your Ford Transit Connect model to ensure proper fit and performance.
Q4: Is it difficult to change the fuel filter myself?
A4: With the right tools and instructions, it’s a manageable DIY task for most people with basic mechanical skills.
Q5: What if I encounter problems during the replacement?
A5: If you encounter any difficulties, it’s best to consult your owner’s manual or seek professional help from a qualified mechanic.
