Low battery
Battery level is below 20%. Connect charger soon.


Honda Shuttle Wiring Diagram – Complete Electrical Guide
Is your Honda Shuttle experiencing electrical gremlins? Flickering lights, non-functioning accessories, or a complete failure to start can all point to issues within your vehicle’s complex electrical system. Navigating this intricate web of wires and circuits can be daunting, but with the right resources, including a detailed Honda Shuttle wiring diagram, troubleshooting and repairs become significantly easier. This comprehensive guide will provide you with the knowledge and resources you need to understand and effectively utilize these invaluable documents.
Understanding the Importance of a Honda Shuttle Wiring Diagram
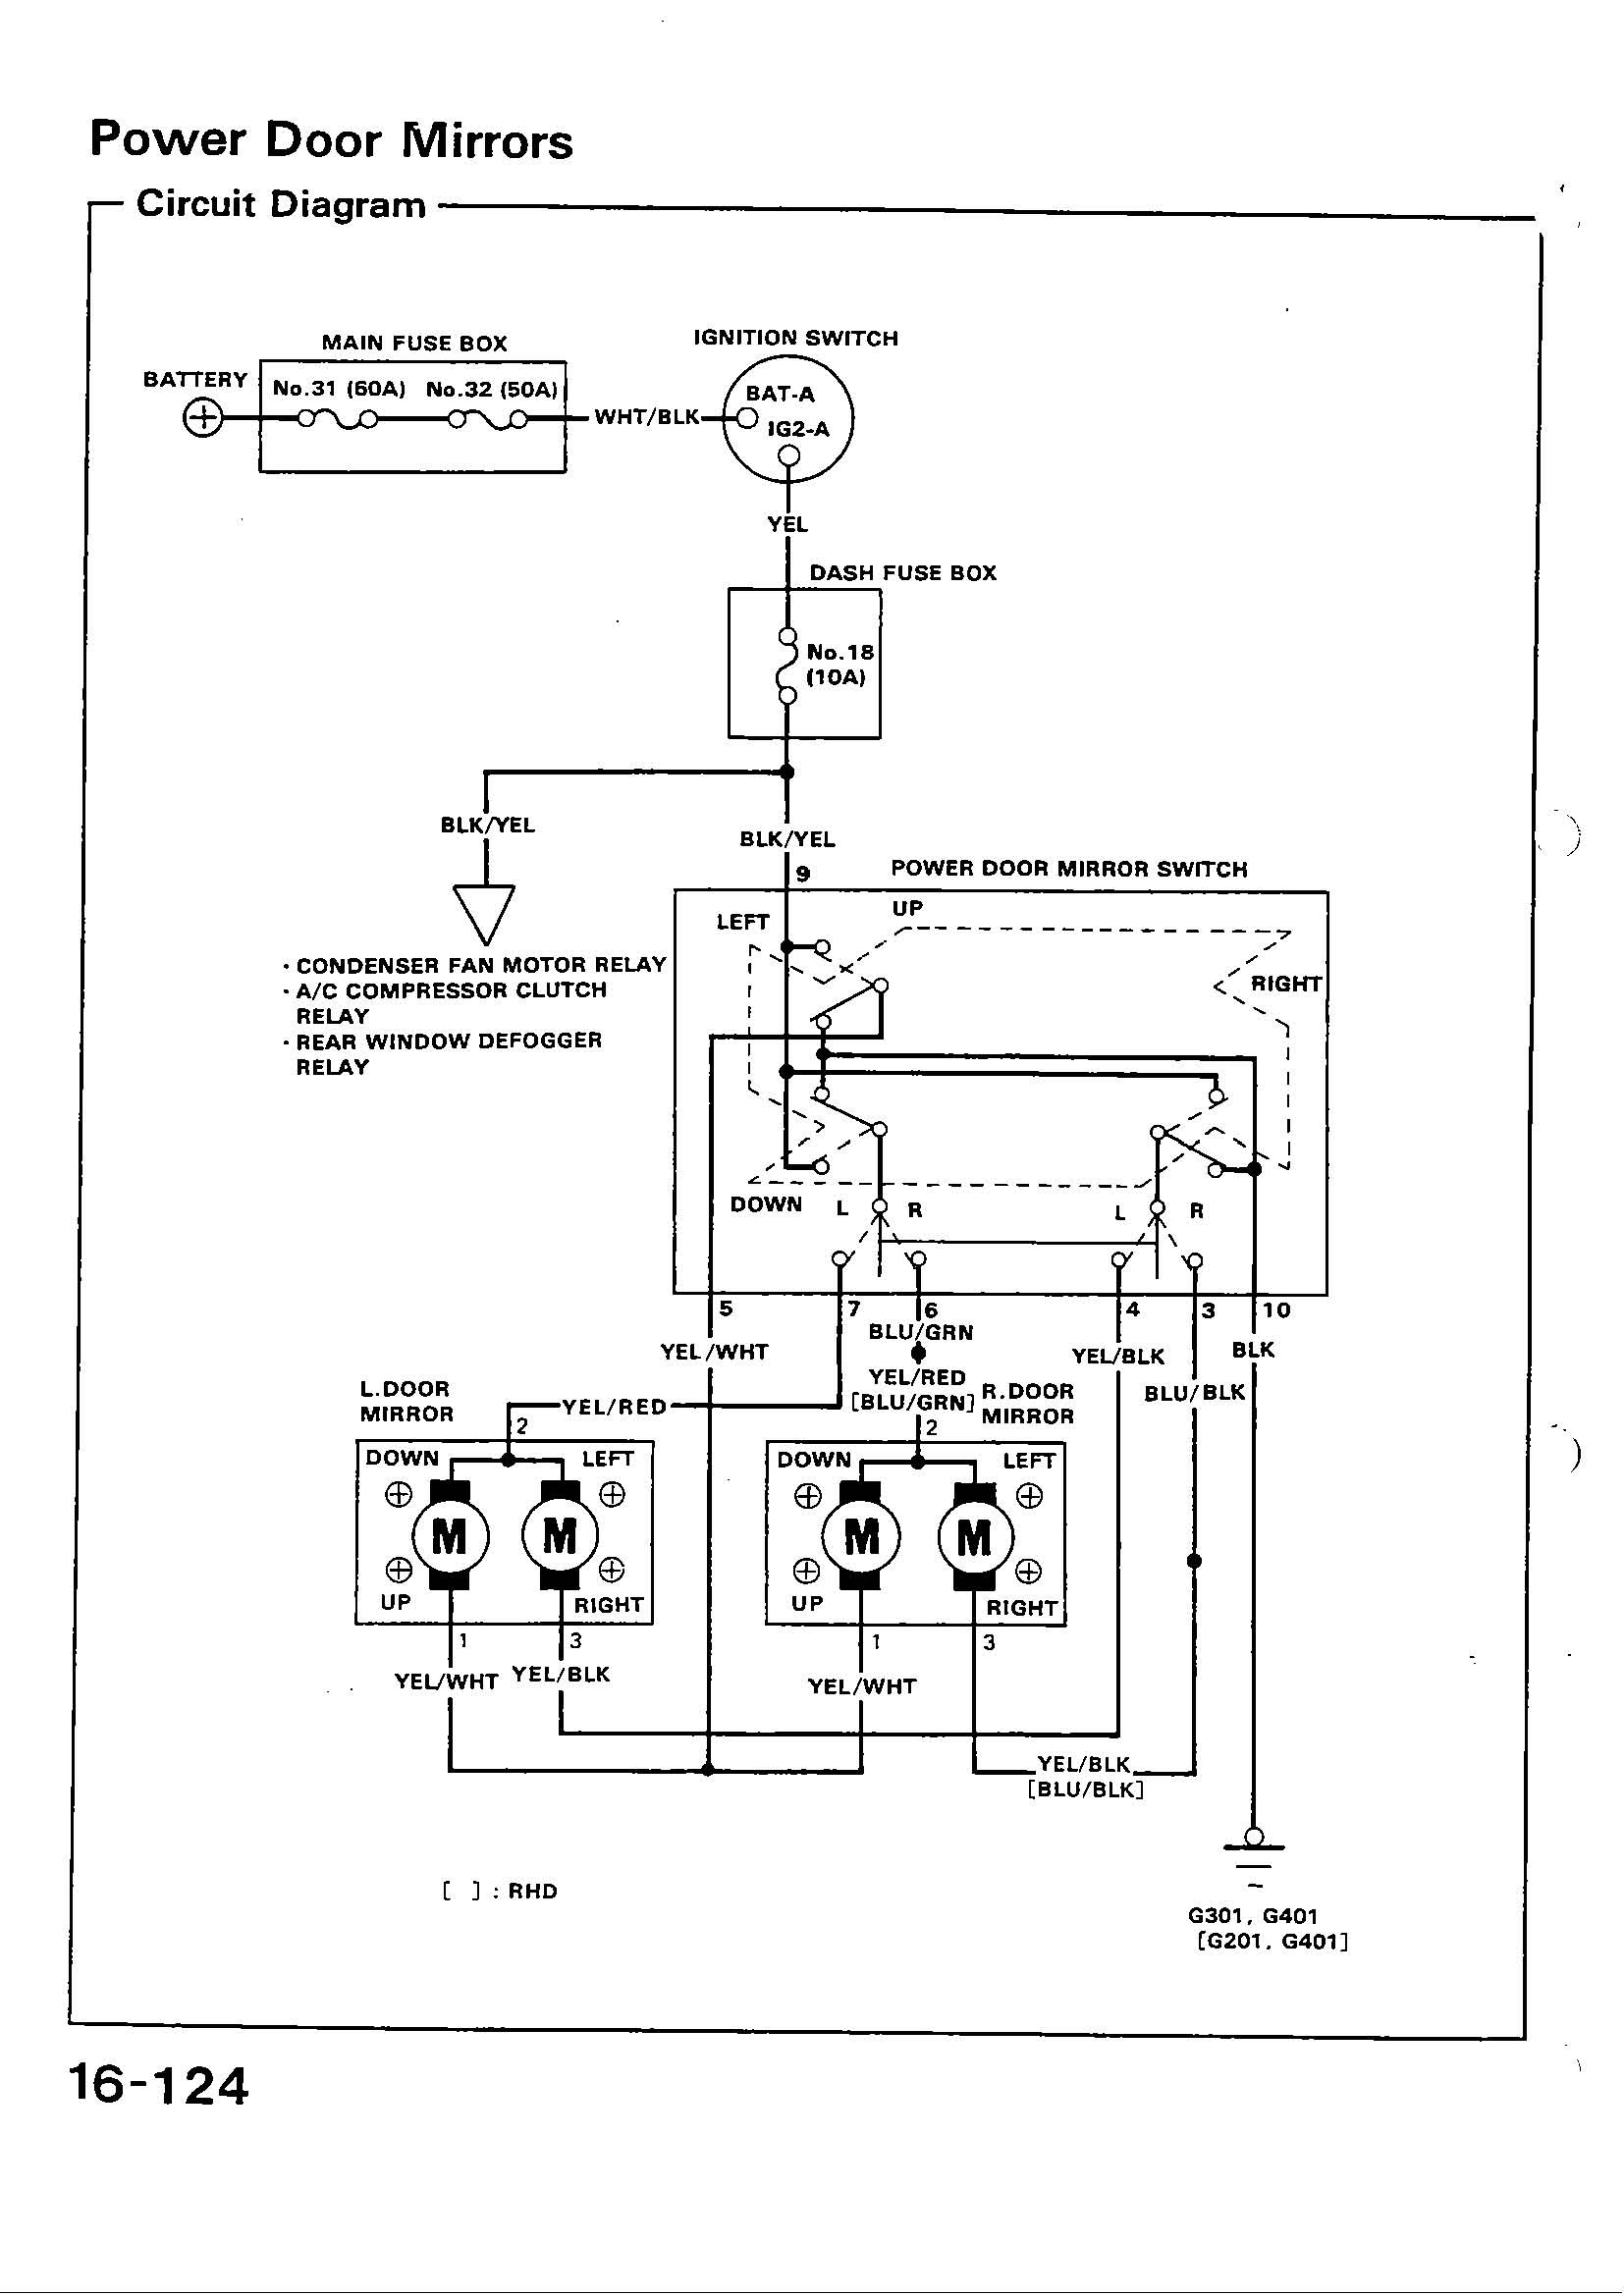
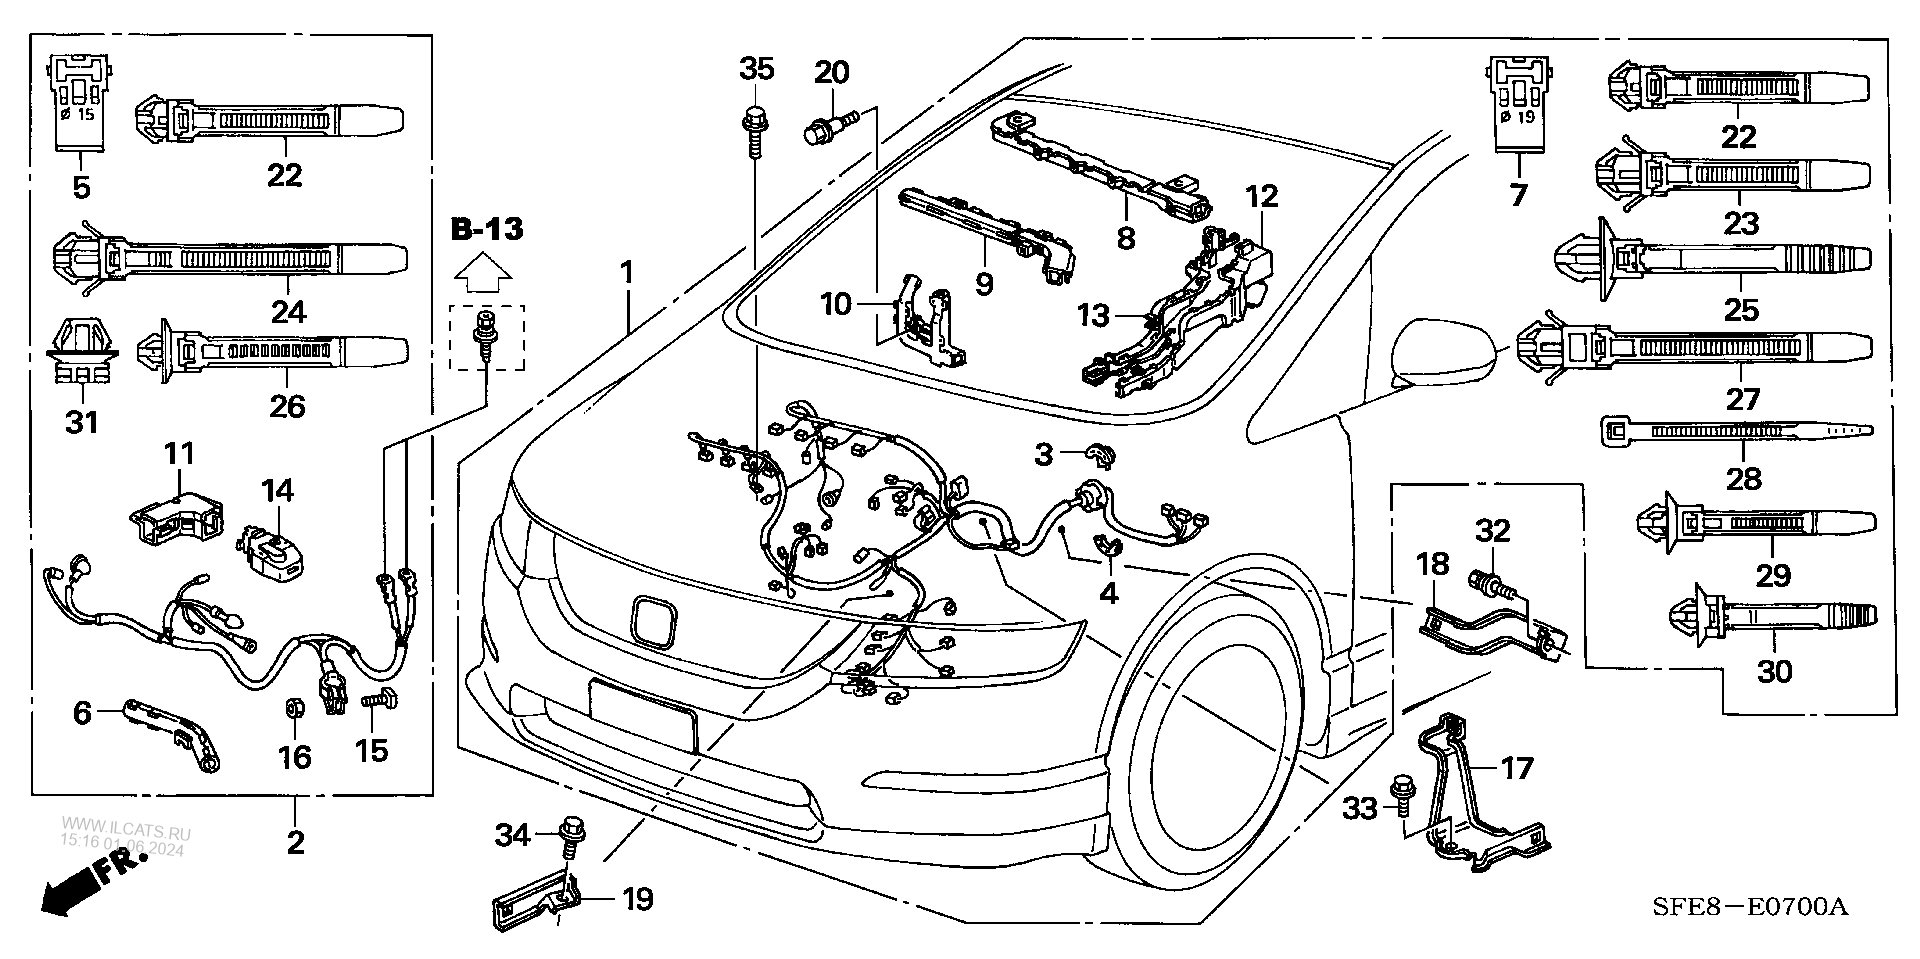
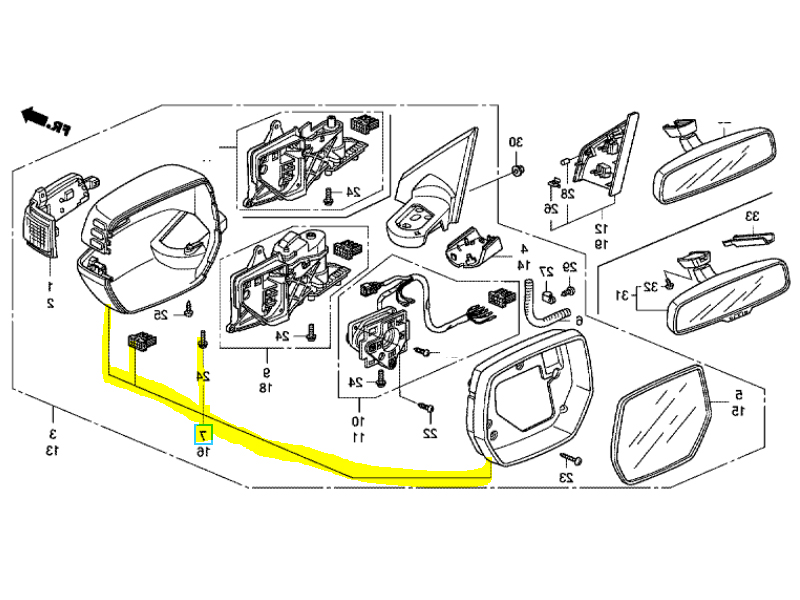
The Honda Shuttle, like all modern vehicles, relies heavily on its electrical system to operate. From the engine management system to the interior lights, every component is interconnected through a network of wires, fuses, relays, and connectors. Without a clear understanding of this system, diagnosing electrical problems can be a frustrating and time-consuming process. A Honda Shuttle wiring diagram acts as a roadmap, providing crucial information about:
- Wire Colors: Identifying the specific colors of wires used for each circuit.
- Component Locations: Showing the physical location of fuses, relays, sensors, and other electrical components.
- Circuit Pathways: Illustrating the flow of electricity through each circuit, from the power source to the final component.
- Connector Pinouts: Detailing the pin configurations of connectors, allowing for accurate testing and troubleshooting.
- Fuse and Relay Identification: Indicating the location and amperage of fuses and the function of relays.
By using a wiring diagram, you can pinpoint the source of electrical faults, perform accurate testing with a multimeter, and safely repair or replace damaged components. This not only saves you time and money but also prevents potential damage to your vehicle’s electrical system.
Where to Find Your Honda Shuttle Wiring Diagram
Obtaining a reliable Honda Shuttle wiring diagram is the first crucial step. Here are several options to consider:
- Official Honda Service Manuals: These are the most comprehensive and accurate resources. They often include detailed wiring diagrams, component locations, and troubleshooting procedures. You can usually find these manuals online through reputable sources or at automotive libraries.
- Online Repair Manuals (e.g., Haynes, Chilton): These manuals often include wiring diagrams and are generally more affordable than the official Honda service manuals. They provide a good overview of the electrical system but may lack the level of detail found in the official manuals.
- Online Forums and Communities: Honda Shuttle owner forums and online communities can be valuable resources. Members may share wiring diagrams or provide links to downloadable versions. Be sure to verify the diagram’s accuracy before using it.
- Specialized Automotive Wiring Diagram Websites: Several websites specialize in providing wiring diagrams for various vehicle makes and models. These sites often offer downloadable diagrams for a fee.
- Local Auto Parts Stores: Some auto parts stores may carry service manuals or have access to wiring diagrams for your Honda Shuttle.
Important Considerations when Choosing a Diagram:
- Year and Trim: Ensure the diagram specifically matches your Honda Shuttle’s model year and trim level, as electrical systems can vary between different versions.
- Accuracy: Always verify the diagram’s accuracy by comparing it to your vehicle’s actual wiring and components.
- Clarity: Choose a diagram that is easy to read and understand, with clear labeling and color-coding.
- Printable or Digital Format: Consider whether you prefer a printed copy or a digital version that you can access on a computer or tablet.
Using Your Honda Shuttle Wiring Diagram Effectively
Once you have obtained a Honda Shuttle wiring diagram, it’s essential to understand how to use it effectively. Here are some key steps:
- Identify the Problem: Determine the specific electrical problem you are trying to diagnose (e.g., non-functioning headlights, a dead battery, etc.).
- Locate the Relevant Circuit: Use the wiring diagram to identify the circuit responsible for the affected component.
- Trace the Wiring Path: Follow the wiring path from the power source (typically the battery or fuse box) to the component.
- Identify Components: Locate all the components in the circuit, such as fuses, relays, connectors, sensors, and switches.
- Perform Testing: Use a multimeter to test for voltage, continuity, and resistance at various points in the circuit to pinpoint the fault.
- Consult the Diagram for Troubleshooting: Refer to the diagram for specific troubleshooting procedures and potential causes of the problem.
- Repair or Replace: Once you have identified the fault, repair the damaged wiring or replace the faulty component.
Common Electrical Problems and How a Diagram Can Help
A Honda Shuttle wiring diagram can be invaluable for troubleshooting common electrical problems, including:
- Dead Battery: Identify the circuits that may be draining the battery, such as parasitic draws from faulty relays or accessories.
- Failing Lights (Headlights, Taillights, Interior Lights): Trace the wiring path to the lights, checking for blown fuses, faulty switches, or damaged wiring.
- Non-Functional Accessories (Power Windows, Radio, AC): Locate the fuses, relays, and wiring associated with the accessory to diagnose the problem.
- Engine Starting Issues: Identify the circuits related to the starter motor, ignition system, and engine control unit (ECU).
- Sensor Failures: Determine the wiring and connections for various sensors, such as the oxygen sensor, crankshaft position sensor, and camshaft position sensor.
Safety Precautions
Working with electrical systems can be dangerous. Always observe these safety precautions:
- Disconnect the Battery: Before working on any electrical circuits, disconnect the negative terminal of the battery to prevent accidental shorts and electrical shocks.
- Wear Safety Glasses: Protect your eyes from debris and sparks.
- Use Insulated Tools: Use insulated tools to prevent electrical shocks.
- Work in a Well-Lit Area: Ensure adequate lighting to see the wiring clearly.
- Double-Check Your Work: Before reconnecting the battery, double-check all connections and wiring to ensure they are correct.
- If Unsure, Consult a Professional: If you are not comfortable working with electrical systems, consult a qualified automotive technician.
Conclusion
A Honda Shuttle wiring diagram is an indispensable tool for anyone who wants to understand, diagnose, and repair electrical problems in their vehicle. By understanding how to obtain, interpret, and use these diagrams, you can save time, money, and frustration while keeping your Honda Shuttle running smoothly. Armed with the right knowledge and resources, you can confidently tackle electrical issues and maintain the reliability of your vehicle.
FAQs
1. Where can I find a free Honda Shuttle wiring diagram?
While official Honda service manuals typically require a purchase, you might find free diagrams on online forums, enthusiast communities, or some specialized automotive websites. However, always verify the accuracy of any free diagram before using it.
2. What does “pinout” mean in a wiring diagram?
A “pinout” refers to the configuration of pins in a connector. The wiring diagram will show you which wire connects to which pin, allowing you to accurately identify and test connections.
3. What tools do I need to use a wiring diagram?
You’ll primarily need a multimeter to test voltage, continuity, and resistance. Other useful tools include wire strippers, crimpers, and a good set of screwdrivers.
4. How do I know if the wiring diagram is for my specific Honda Shuttle model?
The diagram should clearly state the model year, trim level, and sometimes even the engine type that it applies to. Always compare the diagram’s information with your vehicle’s specifications.
5. Can I damage my car if I use the wiring diagram incorrectly?
Yes, incorrect use of a wiring diagram can lead to damage. Always double-check your connections, and if you’re unsure about a procedure, consult a professional mechanic.
