Low battery
Battery level is below 20%. Connect charger soon.


How To Stain Hardwood Floors: The Step-by-Step DIY Guide for a Perfect Finish
Hardwood floors are a timeless classic, adding warmth, elegance, and value to any home. Over time, however, they can lose their luster, appearing dull and worn. Restoring their beauty through staining is a rewarding DIY project that can dramatically transform your space. This comprehensive guide will walk you through the entire process, from preparation to the final coat, ensuring you achieve a professional-looking finish on your hardwood floors. Let’s dive in and learn how to stain your floors like a pro!
1. Preparation: The Foundation of a Flawless Finish
Thorough preparation is the single most crucial step for successful staining. Rushing this stage will almost certainly lead to an uneven, blotchy finish. Take your time and be meticulous.
Assess Your Floors:
- Type of Wood: Identify the type of wood (e.g., oak, maple, pine). Different woods absorb stain differently.
- Existing Finish: Determine if your floors have a polyurethane finish, wax, or other coatings. This will dictate your sanding approach.
- Condition: Inspect for any damage, such as deep scratches, dents, or loose boards. Address these before sanding.
Gather Your Supplies:
- Safety Gear:
- Respirator (NIOSH-approved)
- Eye protection (goggles)
- Gloves
- Knee pads
- Sanding Equipment:
- Drum sander (for larger areas – rent from a local hardware store)
- Edger (for edges and corners – rent or purchase)
- Orbital sander (for final sanding and detailing)
- Sandpaper (various grits: coarse, medium, fine)
- Staining & Finishing Materials:
- Wood stain (choose your desired color)
- Pre-stain wood conditioner (essential for even stain absorption)
- Stir sticks
- Clean rags or staining pads
- Polyurethane finish (oil-based or water-based)
- Applicator pads, brushes, or rollers for polyurethane
- Cleaning Supplies:
- Shop vacuum with brush attachment
- Tack cloths
- Mineral spirits (for cleanup)
- Safety Gear:
Prepare the Room:
- Remove all furniture and rugs.
- Cover or remove baseboards (optional, but recommended for a cleaner finish).
- Seal doorways with plastic sheeting to prevent dust from spreading.
- Ensure adequate ventilation. Open windows and doors, and consider using fans.
2. Sanding: Smoothing the Surface for Stain
Sanding is the process of removing the old finish and creating a smooth, porous surface that will readily absorb the stain.
First Pass (Coarse Grit):
- Use the drum sander with a coarse grit sandpaper (e.g., 36-grit or 40-grit) to remove the old finish.
- Sand with the grain of the wood.
- Overlap each pass slightly.
- Be careful not to stay in one spot too long to avoid creating dips in the floor.
- Use the edger to sand the edges and corners.
Second Pass (Medium Grit):
- Switch to a medium grit sandpaper (e.g., 60-grit or 80-grit).
- Sand with the grain, removing any scratches from the first pass.
- Repeat the process with the edger.
Third Pass (Fine Grit):
- Use a fine grit sandpaper (e.g., 100-grit or 120-grit).
- Sand with the grain for a final smoothing.
- Orbital sander can be used for the final pass for a smoother finish.
- Repeat with the edger.
Cleaning After Sanding:
- Thoroughly vacuum the entire floor with a shop vacuum, paying attention to crevices and corners.
- Wipe the floor down with tack cloths to remove any remaining dust particles.
3. Staining: Applying Color to Your Hardwood
Now comes the exciting part – applying the stain!
Apply Pre-Stain Wood Conditioner:
- This is crucial, especially for softwoods and woods that absorb stain unevenly (like pine).
- Apply a generous coat of pre-stain wood conditioner according to the manufacturer’s instructions.
- Let it penetrate for the recommended time (usually 15-30 minutes).
- Wipe off any excess conditioner with a clean rag.
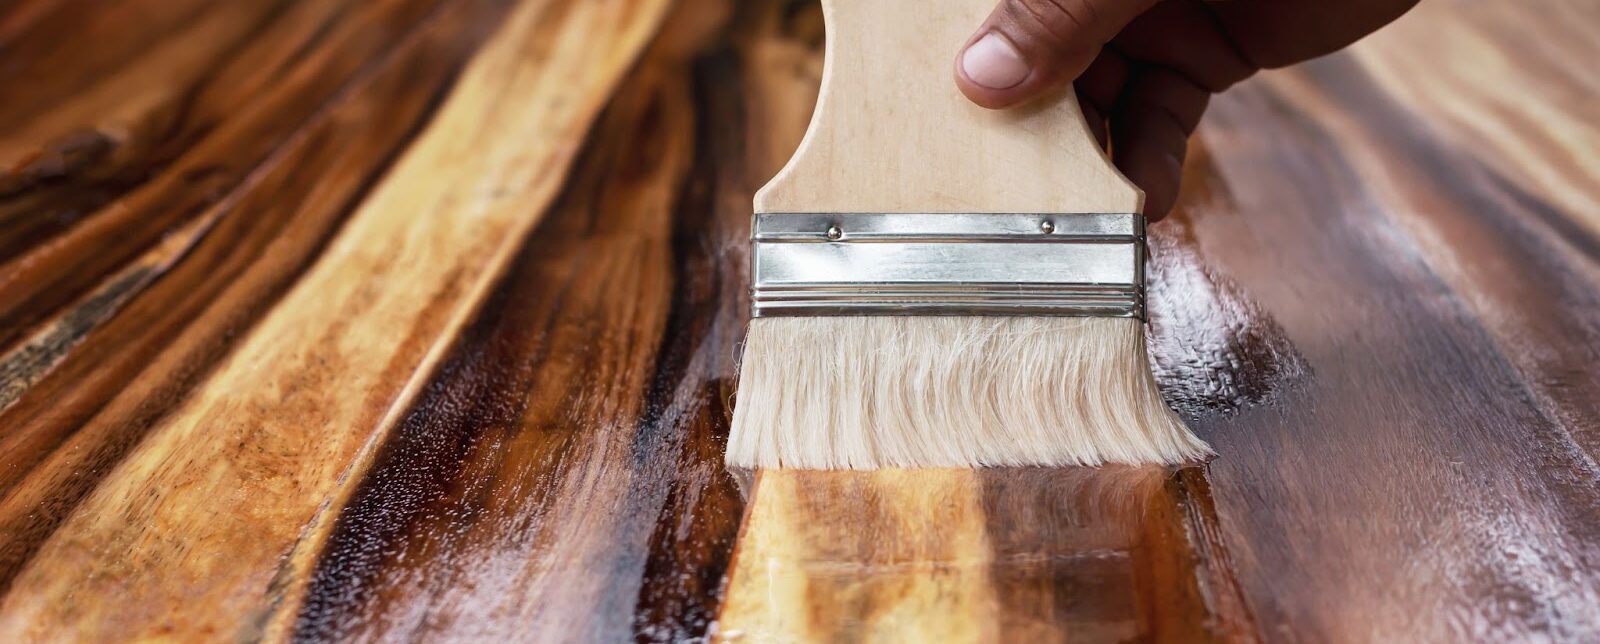
Apply the Stain:
- Stir the stain thoroughly before using. Do not shake the stain.
- Use a clean rag, staining pad, or brush to apply the stain in the direction of the wood grain.
- Work in manageable sections (e.g., 3-4 boards wide).
- Apply a generous coat, ensuring even coverage.
- Let the stain penetrate for the recommended time (check the stain manufacturer’s instructions). This is usually 5-15 minutes, but varies depending on the stain and wood type.
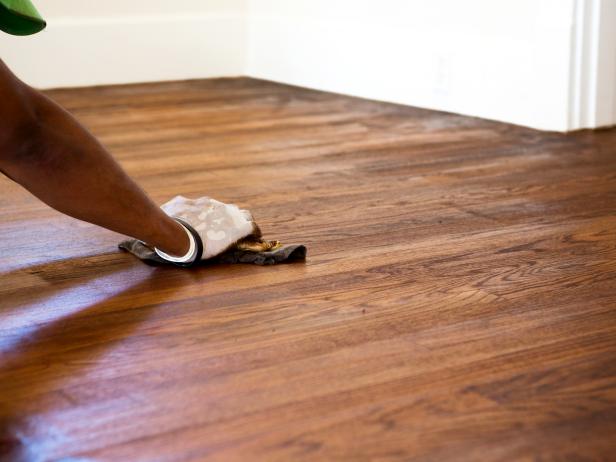
- Wipe off any excess stain with a clean rag, following the grain. The amount of stain left on the wood will determine the color intensity.
- Allow the stain to dry completely according to the manufacturer’s instructions. This can take several hours, or even overnight.
Multiple Coats (Optional):
- For a deeper color, you can apply a second coat of stain after the first coat has dried completely.
- Lightly sand the floor with fine-grit sandpaper (e.g., 220-grit) after the first coat of stain has dried to remove any raised grain.
- Vacuum and tack cloth the floor before applying the second coat.
4. Finishing: Protecting and Sealing Your Investment
The final step is applying a protective finish to seal in the stain and protect your floors from wear and tear.
Choose Your Finish:
- Oil-Based Polyurethane: Durable, provides a warm amber tone, and is more resistant to scratches. Requires longer drying times and has a strong odor.
- Water-Based Polyurethane: Dries quickly, has a clear finish, and is low-odor. Less durable than oil-based.
Apply the First Coat of Polyurethane:
- Stir the polyurethane gently before using. Do not shake.
- Use a clean applicator pad, brush, or roller, following the manufacturer’s instructions.
- Apply a thin, even coat in the direction of the wood grain. Avoid creating bubbles or drips.
- Allow the first coat to dry completely according to the manufacturer’s instructions (usually 2-6 hours for water-based, 8-24 hours for oil-based).
Lightly Sand Between Coats (Optional, but Recommended):
- After the first coat has dried, lightly sand the floor with very fine-grit sandpaper (e.g., 220-grit) to remove any imperfections and create a better bond for the next coat.
- Vacuum and tack cloth the floor thoroughly.
Apply Subsequent Coats of Polyurethane:
- Apply additional coats of polyurethane, following the same process as the first coat.
- Most floors require 2-3 coats of polyurethane for adequate protection.
- Allow each coat to dry completely before applying the next.
Curing Time:
- Allow the floors to cure completely according to the manufacturer’s instructions. This is crucial for durability. This can take several days or even weeks.
- Avoid heavy traffic and placing furniture on the floors during the curing period.
5. Final Touches and Maintenance
- Reinstall Baseboards (if removed).
- Replace Furniture and Rugs.
- Clean Your Floors: Sweep or vacuum regularly to remove dirt and debris. Avoid harsh chemicals. Use a floor cleaner specifically designed for hardwood floors.
- Protect Your Floors: Use felt pads under furniture legs to prevent scratches. Use rugs in high-traffic areas.
Conclusion
Staining hardwood floors is a rewarding DIY project that can significantly enhance the beauty and value of your home. By following these step-by-step instructions, you can achieve a professional-looking finish that will last for years to come. Remember, patience and attention to detail are key. So, gather your supplies, prepare your space, and get ready to transform your hardwood floors!
Frequently Asked Questions (FAQs)
1. How long does it take to stain hardwood floors?
The entire process, from preparation to the final coat, can take several days to a week or more, depending on the size of the area, drying times, and the number of coats of polyurethane.
2. Can I stain hardwood floors without sanding?
Generally, no. Sanding is essential to remove the old finish and create a surface that will properly absorb the stain. There are some “stain and poly in one” products, but they typically don’t offer the same durability or quality as a traditional stain and separate polyurethane finish.
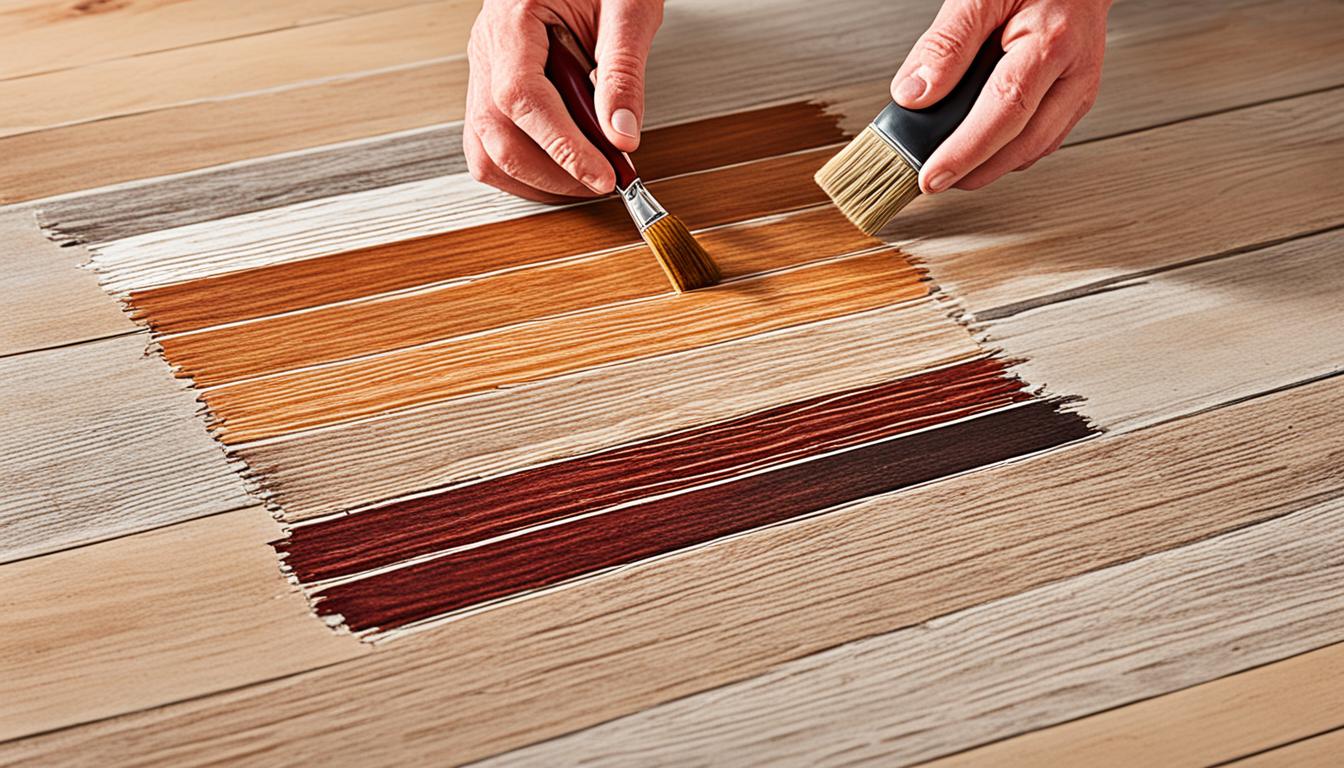
3. What is the best type of stain for hardwood floors?
The best type of stain depends on your personal preferences and the type of wood. Oil-based stains are known for their rich color and durability, while water-based stains are low-odor and dry faster. Always test the stain in an inconspicuous area first.
4. How many coats of polyurethane do I need?
Most hardwood floors require 2-3 coats of polyurethane for adequate protection. The number of coats can vary depending on the traffic the floor receives and the type of polyurethane used.
5. What if my stain is uneven?
Uneven staining is often caused by inadequate preparation, uneven application, or inconsistent absorption of the stain. Ensure you use pre-stain wood conditioner, apply the stain evenly, and wipe off any excess stain. If the unevenness is severe, you may need to sand the floor and re-stain.
