Low battery
Battery level is below 20%. Connect charger soon.


Mazda CX-5 Oil Pressure Sensor Location – Quick DIY Fix Guide
Is your Mazda CX-5’s dashboard light flashing a dreaded red? The oil pressure warning light is a serious indicator, and often, a faulty oil pressure sensor is the culprit. Ignoring this issue can lead to severe engine damage, making it crucial to address it promptly. This guide will walk you through the location of your Mazda CX-5 oil pressure sensor and provide a straightforward, DIY approach to replacing it. We’ll cover everything you need to know to potentially save yourself a trip to the mechanic and ensure your engine stays healthy.
Understanding the Importance of Your Oil Pressure Sensor
The oil pressure sensor (also known as the oil pressure sending unit) plays a vital role in monitoring your engine’s lubrication system. It’s responsible for:
- Monitoring Oil Pressure: Constantly measuring the oil pressure within the engine.
- Alerting the Driver: Sending a signal to the dashboard warning light to illuminate if the oil pressure drops below a safe level.
- Protecting Your Engine: Warning you of potential problems, like a failing oil pump, low oil levels, or clogged oil passages, which can lead to catastrophic engine failure.
A malfunctioning sensor can falsely trigger the warning light, leading to unnecessary panic. Conversely, a faulty sensor can fail to alert you to a genuine problem, putting your engine at risk.
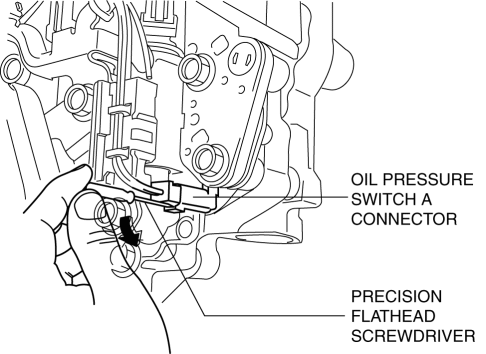
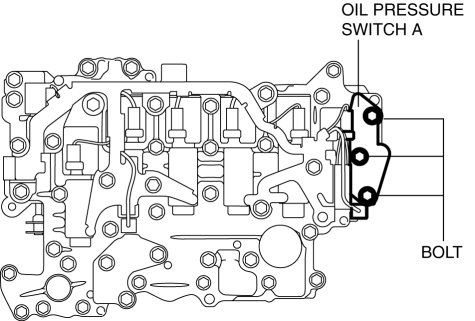
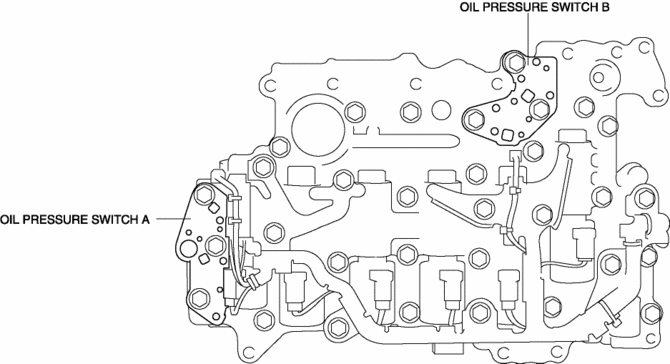
Locating the Oil Pressure Sensor on Your Mazda CX-5
The location of the oil pressure sensor can vary slightly depending on the model year and engine type of your Mazda CX-5. However, it’s generally found in a common location:
- Typical Location: The oil pressure sensor is usually screwed into the engine block, near the oil filter or the oil cooler.
- Visual Clues: Look for a small, cylindrical sensor with a single electrical connector.
- Model Year Specifics: Consult your owner’s manual or a repair manual specific to your Mazda CX-5 model year for the exact location. Online resources like YouTube tutorials can also be very helpful.
Here are some tips to pinpoint its location:
- Underneath the Vehicle: You may need to access the sensor from underneath the vehicle.
- Near the Oil Filter: Start by examining the area around the oil filter.
- Check the Engine Block: Trace the oil filter housing and look for a sensor screwed into the engine block nearby.
DIY Replacement: A Step-by-Step Guide
Replacing the oil pressure sensor on your Mazda CX-5 is a manageable DIY task. Here’s a simple guide:
What You’ll Need:
- Replacement Oil Pressure Sensor (ensure it’s the correct part for your CX-5 model)
- Wrench (matching the size of the sensor)
- Socket Set (for any undercarriage access)
- Gloves
- Safety Glasses
- Jack and Jack Stands (if necessary to access from under the car)
- Drain Pan (to catch any spilled oil)
- Torque Wrench (highly recommended for proper installation)
Step-by-Step Instructions:
- Safety First: Park your CX-5 on a level surface, engage the parking brake, and disconnect the negative battery terminal.
- Access the Sensor: Determine how you’ll access the sensor. This might involve jacking up the car and securing it with jack stands.
- Locate the Sensor: Find the oil pressure sensor as described above.
- Disconnect the Electrical Connector: Carefully unplug the electrical connector from the sensor. It may have a small clip or tab that needs to be released.
- Unscrew the Old Sensor: Using the appropriate wrench, unscrew the old oil pressure sensor from the engine block. Be prepared for a small amount of oil to spill. Have your drain pan ready.
- Prepare the New Sensor: Apply a small amount of thread sealant to the threads of the new sensor (optional, but recommended to prevent leaks).
- Install the New Sensor: Screw the new sensor into the engine block by hand first, then tighten it with the wrench to the manufacturer’s specified torque (consult your repair manual). Do not overtighten.
- Reconnect the Electrical Connector: Plug the electrical connector back into the new sensor.
- Lower the Vehicle (if applicable): If you jacked up the car, lower it carefully.
- Reconnect the Battery: Reconnect the negative battery terminal.
- Check for Leaks: Start the engine and let it run for a few minutes, checking for any oil leaks around the new sensor.
- Test Drive: After confirming no leaks, take your CX-5 for a short test drive to ensure the warning light remains off.
Important Considerations
- Part Compatibility: Always use the correct replacement part for your Mazda CX-5 model year and engine.
- Torque Specifications: Tightening the sensor to the correct torque is crucial. Over-tightening can damage the sensor or the engine block, while under-tightening can lead to leaks.
- Oil Spillage: Have a drain pan ready to catch any oil that may spill during sensor removal.
- Safety First: Always prioritize safety. Wear safety glasses and gloves. If you’re uncomfortable working on your car, consult a professional mechanic.
Conclusion
Replacing the oil pressure sensor on your Mazda CX-5 can be a straightforward DIY project that can save you money and potentially prevent serious engine damage. By following these steps and taking the necessary precautions, you can restore peace of mind and ensure your engine’s health. Remember to consult your owner’s manual or a repair manual specific to your vehicle for detailed instructions and specifications.
Frequently Asked Questions (FAQs)
Q1: How often should I replace the oil pressure sensor?
A1: There isn’t a set replacement interval. The sensor typically lasts for several years. However, if the oil pressure warning light comes on and the oil pressure is within the normal range, or if the sensor is showing signs of failure (like a fluctuating reading), it’s time for a replacement.
Q2: Can I drive my Mazda CX-5 with the oil pressure warning light on?
A2: Driving with the oil pressure warning light on is not recommended. It indicates a potential problem with the engine’s lubrication system. Continuing to drive could lead to severe engine damage. Address the issue as quickly as possible.
Q3: What if the oil pressure light comes on after replacing the sensor?
A3: If the light persists after replacing the sensor, the problem might lie elsewhere, such as a faulty oil pump, a clogged oil filter, or low oil pressure. Consult a mechanic to diagnose the underlying cause.
Q4: Is it possible to test the oil pressure sensor before replacing it?
A4: Yes, you can test the sensor. A mechanic can use an oil pressure gauge to verify whether the sensor’s readings match the actual oil pressure. This helps confirm if the sensor is truly faulty.
Q5: What happens if I overtighten the oil pressure sensor?
A5: Overtightening can damage the sensor itself or strip the threads in the engine block. This can lead to oil leaks and require costly repairs. Always use the correct torque specification.
