Low battery
Battery level is below 20%. Connect charger soon.
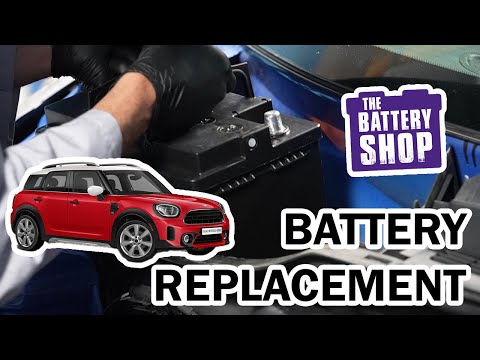


Mini Cooper Countryman Battery Location & Easy Replacement Tutorial
The Mini Cooper Countryman, with its iconic styling and practical features, remains a popular choice for drivers seeking a fun and versatile vehicle. However, like all cars, it requires regular maintenance, and one of the most common tasks is battery replacement. Knowing where the battery is located in your Countryman, and how to replace it, can save you time, money, and the inconvenience of a dead battery. This guide will walk you through the process, ensuring a smooth and successful battery replacement.
Where is the Battery Located in a Mini Cooper Countryman?
Unlike some vehicles, the Mini Cooper Countryman doesn’t always make its battery location immediately obvious. The location varies slightly depending on the model year, but the most common locations are:
- Under the Hood (Engine Bay): This is the most common location for most Countryman models. The battery is usually found on the passenger side, near the firewall, often secured by a battery clamp.
- In the Trunk (Under the Floor): Some older or specific Countryman models may have the battery located beneath the floor of the trunk, typically under a cover or panel.
Before you begin, always consult your owner’s manual to confirm the exact battery location for your specific model year. This is crucial to avoid any confusion or unnecessary searching.
Step-by-Step Mini Cooper Countryman Battery Replacement Guide
Replacing your Countryman’s battery is a straightforward process, but proper safety precautions are essential. Follow these steps carefully:
1. Gather Your Supplies:
- New Battery: Ensure you purchase the correct battery size and type for your Countryman. Your owner’s manual or a local auto parts store can provide this information. Consider the CCA (Cold Cranking Amps) rating, particularly if you live in a cold climate.
- Wrench Set: You’ll need wrenches or sockets of the appropriate sizes to loosen the battery terminals and the battery hold-down clamp.
- Gloves: To protect your hands from battery acid.
- Safety Glasses: To protect your eyes.
- Battery Terminal Cleaner (Optional): For cleaning any corrosion from the terminals.
- Memory Saver (Optional): This device plugs into the car’s OBD-II port and maintains power to the car’s electrical system during the battery change, preserving radio presets and other settings.
- Rags or Paper Towels: For cleaning up any spills.
2. Safety First:
- Park on a Level Surface: Engage the parking brake.
- Turn Off the Engine and Remove the Key: Ensure the ignition is completely off.
- Open the Hood/Trunk: Locate the battery and access it.
3. Disconnect the Battery:
- Locate the Terminals: Identify the positive (+) and negative (-) terminals on the battery.
- Loosen the Negative Terminal: Use the appropriate wrench to loosen the nut on the negative (-) terminal. Carefully remove the cable from the terminal, ensuring it doesn’t touch any metal parts.
- Loosen the Positive Terminal: Repeat the process for the positive (+) terminal, carefully removing the cable.
- Important Note: Always disconnect the negative terminal first and reconnect it last. This minimizes the risk of short circuits.
4. Remove the Old Battery:
- Release the Battery Hold-Down: Locate the battery hold-down clamp or bracket. This will vary depending on your model. Loosen or remove the clamp.
- Carefully Lift Out the Old Battery: Batteries are heavy! Lift the battery straight up and out of the compartment. Be careful not to spill any battery acid.
- Clean the Battery Tray (Optional): If there’s any corrosion or debris in the battery tray, clean it using a baking soda and water solution (baking soda neutralizes the acid). Rinse thoroughly and dry.
5. Install the New Battery:
- Place the New Battery in the Tray: Carefully lower the new battery into the battery compartment, ensuring it’s properly oriented.
- Secure the Battery Hold-Down: Reinstall the battery hold-down clamp or bracket and tighten it securely.
- Connect the Positive Terminal: Attach the positive (+) cable to the positive terminal and tighten the nut.
- Connect the Negative Terminal: Attach the negative (-) cable to the negative terminal and tighten the nut.
6. Final Steps:
- Inspect Connections: Double-check that both terminals are securely connected.
- Close the Hood/Trunk: Close the hood or trunk.
- Start the Engine: Start your Mini Cooper Countryman and check that everything is working correctly, including the radio and other electronic systems. If you used a memory saver, your settings should be preserved.
- Dispose of the Old Battery Properly: Take your old battery to a local auto parts store or recycling center for safe disposal.
Troubleshooting Common Issues
- Car Won’t Start After Battery Replacement: Double-check all connections, especially the terminals. Ensure the battery is fully charged.
- Error Messages Appear: Some error messages may appear after a battery change. These are often related to the car’s computer needing to relearn certain settings. Driving the car for a short period usually resolves this.
- Radio Code Required: If your radio requires a security code, you’ll need to enter it after the battery replacement. Consult your owner’s manual for the code.
Conclusion: Empowering Your Mini Cooper Countryman Ownership
Replacing your Mini Cooper Countryman’s battery is a manageable task that you can confidently perform with the right knowledge and tools. By following these steps, you can ensure your car’s electrical system functions optimally and avoid costly roadside assistance. This guide empowers you to take control of your vehicle’s maintenance, saving you time and money while keeping your Countryman running smoothly. Remember to always prioritize safety and consult your owner’s manual for specific instructions relevant to your model.
Frequently Asked Questions (FAQs)
How often should I replace my Mini Cooper Countryman battery? The lifespan of a car battery typically ranges from 3 to 5 years, depending on usage, climate, and battery quality. Monitor for signs of a failing battery, such as slow cranking, dim headlights, or frequent jump starts.
Can I use a battery from a different car in my Countryman? No. You must use a battery that meets the specifications for your Mini Cooper Countryman, including the correct size, CCA rating, and terminal configuration. Using the wrong battery can damage your car’s electrical system.
Do I need to reset anything after replacing the battery? You may need to reset your radio and possibly recalibrate the power windows. Some newer models may require a battery registration or adaptation using a diagnostic tool, but this is not always necessary. Consult your owner’s manual or a qualified mechanic if unsure.
What are the symptoms of a failing battery in my Countryman? Common symptoms include slow engine cranking, dim headlights, difficulty starting the car, a clicking sound when trying to start, and the battery light illuminating on the dashboard.
Can I jump-start my Mini Cooper Countryman if the battery is dead? Yes, you can jump-start your Countryman. However, ensure you follow the correct jump-starting procedure. Consult your owner’s manual for detailed instructions, and always connect the jumper cables in the correct order.
