Low battery
Battery level is below 20%. Connect charger soon.


P1541 Seat Leon Code Explained: Decoding the Diagnostic and the Mechanic’s Fix
The digital age has revolutionized car diagnostics. Gone are the days of purely relying on intuition and experience. Now, a flashing check engine light often accompanies a cryptic alphanumeric code, leaving drivers scrambling for answers. If your Seat Leon’s dashboard is illuminated with this warning, and your scan tool reveals the code P1541, you’re in the right place. This article will break down what the P1541 code means, why it’s triggering, and the most common solutions mechanics implement to resolve the issue.
Understanding the P1541 Code: What Does It Mean?
The P1541 trouble code, specific to Volkswagen/Audi group vehicles including the Seat Leon, generally points towards a problem within the Fuel Pump Relay (J17) circuit. More specifically, it indicates a fault in the power supply to the fuel pump itself. This can manifest in several ways:
- No fuel delivery: The most obvious symptom is that the engine may fail to start or will stall shortly after starting, as the fuel pump isn’t providing fuel to the engine.
- Intermittent starting issues: The car may start sometimes and not others, depending on the intermittent nature of the electrical fault.
- Reduced engine performance: If the fuel pump is receiving intermittent power, the engine’s performance can be erratic or significantly reduced.
- Rough idling: The engine might idle roughly or inconsistently.
Essentially, the Engine Control Unit (ECU) is detecting a voltage problem or an open circuit within the fuel pump relay circuit.
Common Causes Behind the P1541 Code
Several factors can trigger the P1541 code. Identifying the root cause is crucial for a proper and lasting repair. Here’s a breakdown of the common culprits:
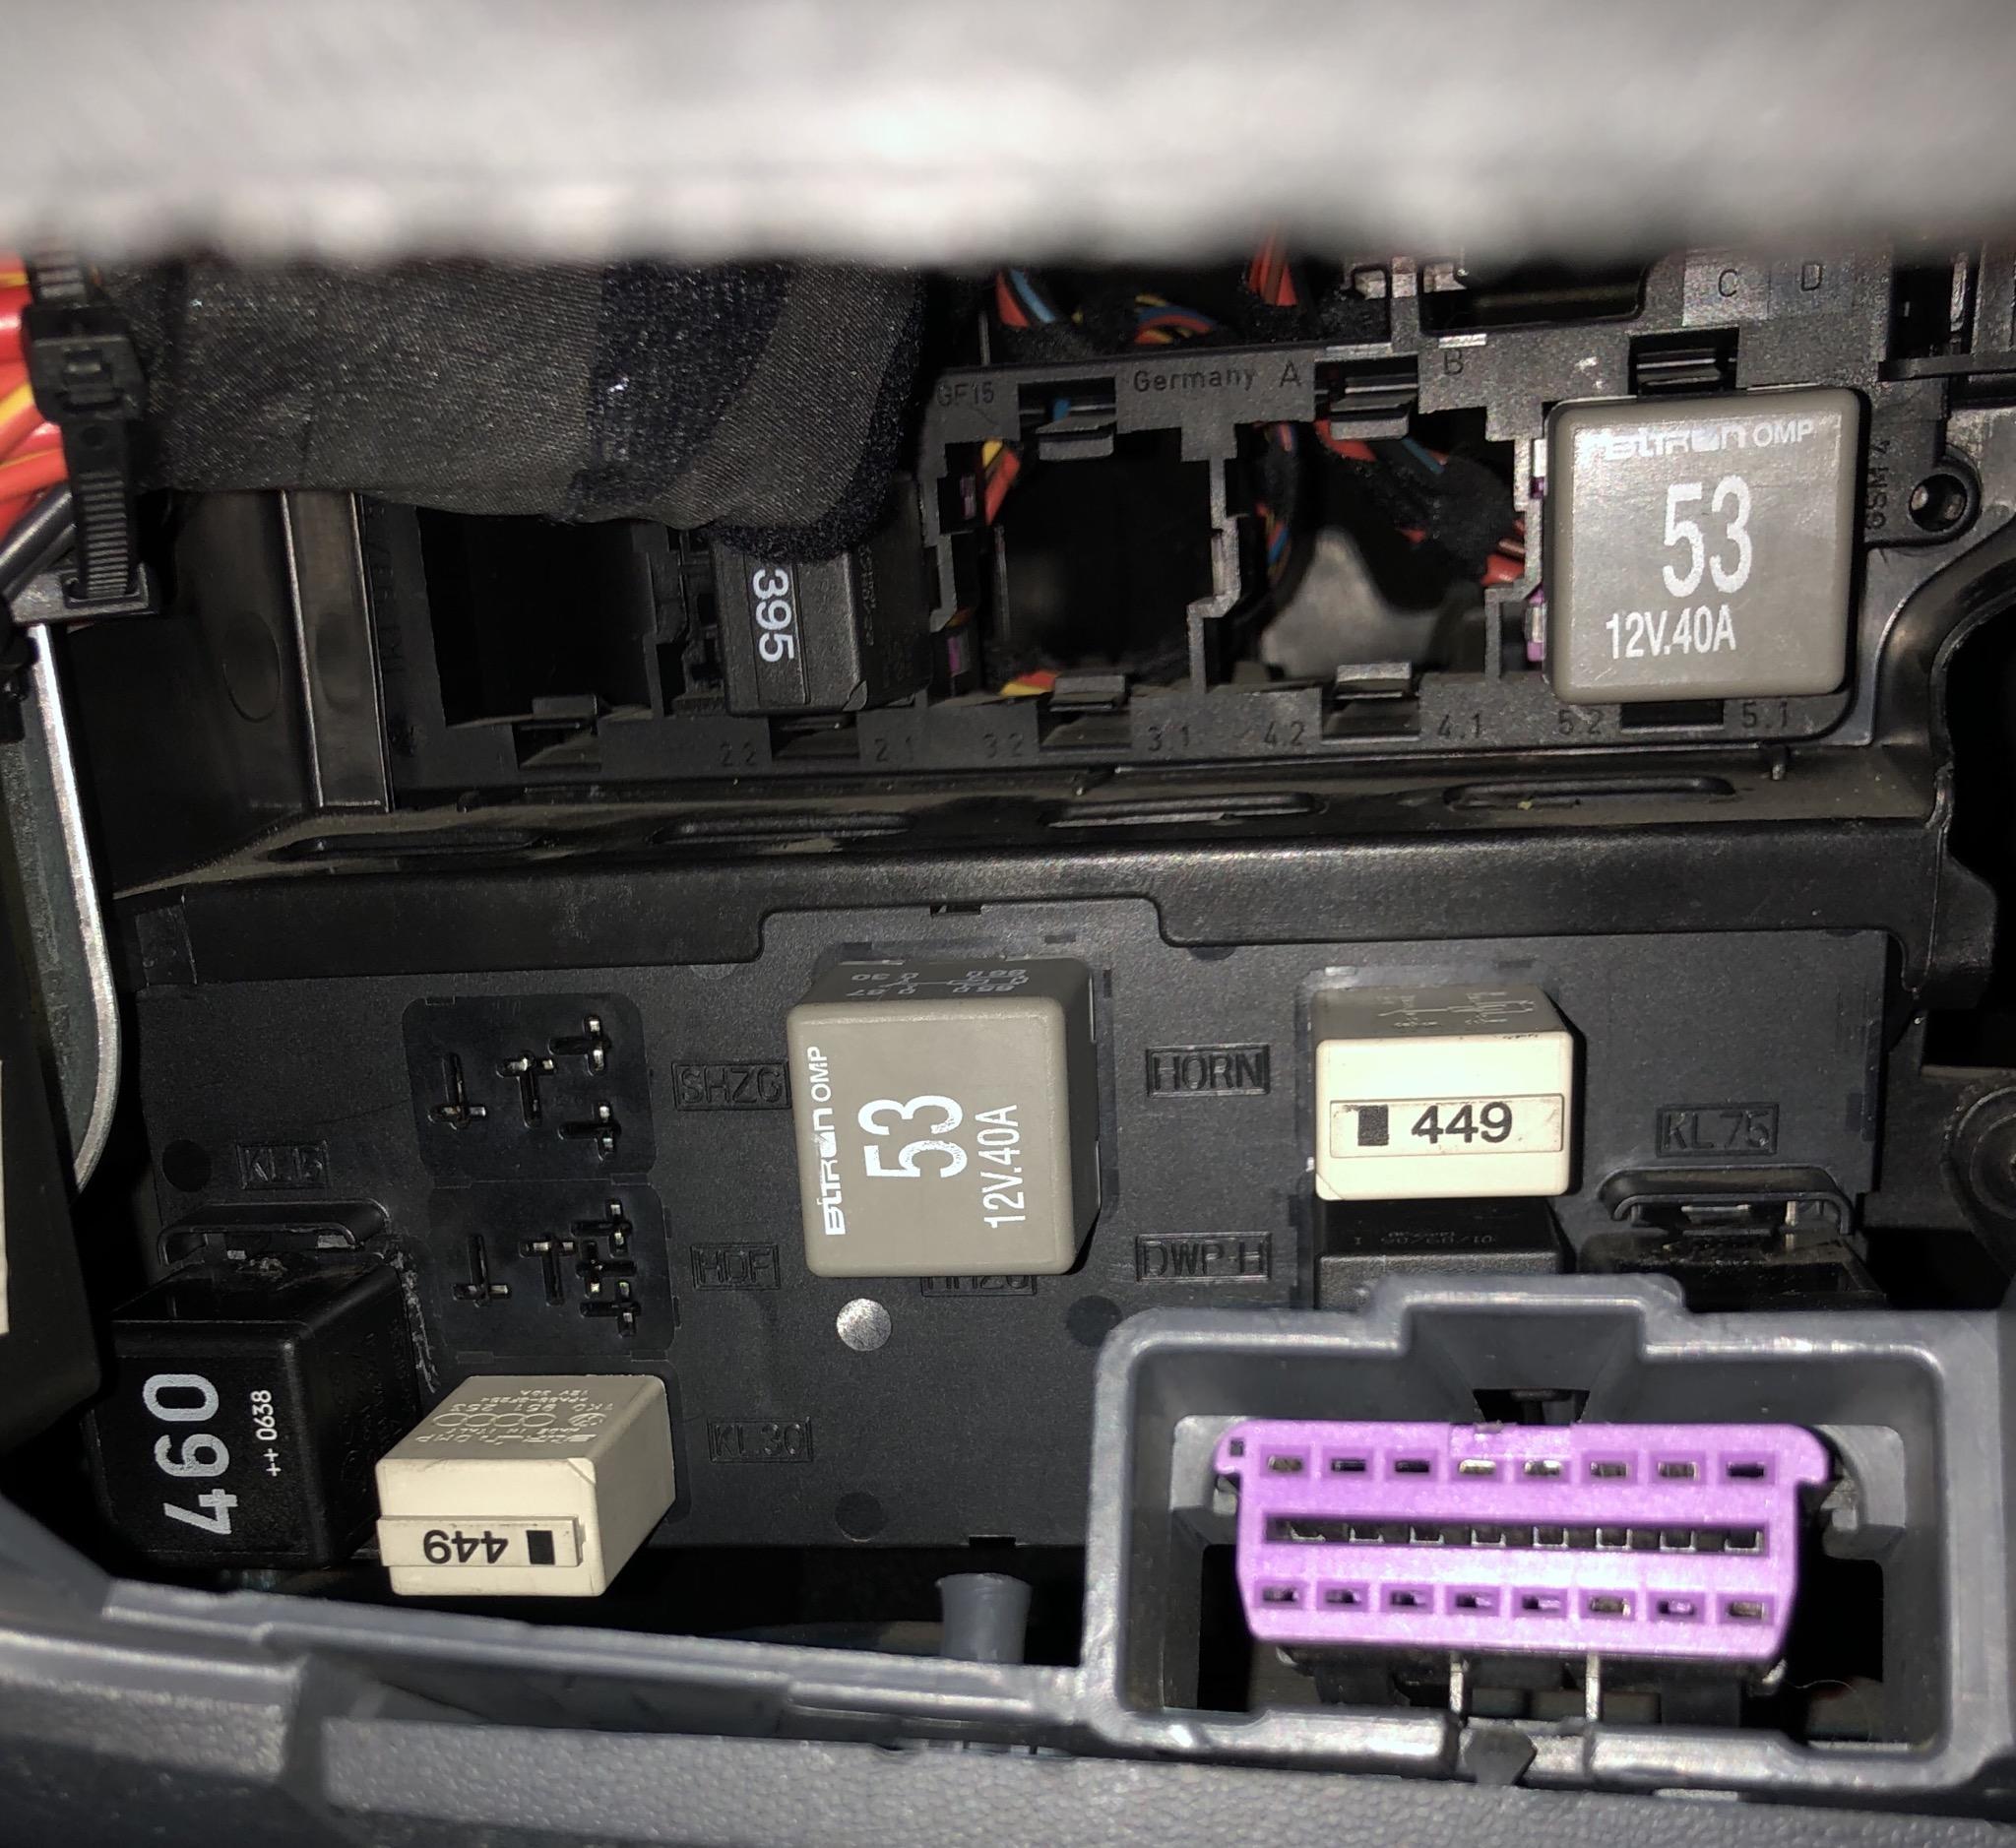
- Faulty Fuel Pump Relay (J17): This is the most common culprit. The relay itself can fail due to age, wear, or internal damage.
- Blown Fuse: A blown fuse in the fuel pump circuit will interrupt power to the relay and the fuel pump.
- Wiring Issues: Corroded, damaged, or loose wiring connections in the fuel pump relay circuit can cause intermittent or complete power loss. This includes the wiring harness leading to the relay, the relay socket, and the wiring to the fuel pump itself.
- Fuel Pump Failure: While less common, the fuel pump itself might be drawing excessive current, causing the relay to fail or the circuit to overload.
- ECU Malfunction: In rare instances, the ECU itself could be faulty and not properly controlling the fuel pump relay.
The Mechanic’s Recommended Fix: A Step-by-Step Approach
Mechanics typically follow a methodical approach to diagnose and repair the P1541 code. Here’s a look at the typical steps:
- Initial Diagnosis with a Scan Tool: The mechanic will use an OBD-II scan tool to confirm the presence of the P1541 code and check for any other related codes.
- Visual Inspection: This crucial step involves a visual inspection of the fuel pump relay, fuse box, and related wiring. The mechanic will look for:
- Corrosion on terminals
- Loose connections
- Signs of overheating or melting
- Damaged wiring insulation
- Fuse Verification: The mechanic will check the fuse associated with the fuel pump relay to ensure it’s intact.
- Relay Testing: The fuel pump relay will be tested. This can be done in a few ways:
- Swapping the relay: A known good relay (from another non-critical circuit, if possible) is swapped in to see if the code clears and the engine starts.
- Using a multimeter: The mechanic can use a multimeter to check the voltage and continuity of the relay circuit.
- Wiring and Connector Checks: Using a multimeter and potentially a wiring diagram, the mechanic will check for voltage drops, open circuits, or shorts in the wiring harness leading to the fuel pump relay and the fuel pump itself. This includes checking the connectors for corrosion or damage.
- Fuel Pump Testing: If the relay, fuse, and wiring check out, the mechanic might test the fuel pump’s current draw to ensure it’s operating within specifications. A fuel pressure test might also be performed to confirm the pump is delivering the correct fuel pressure.
- ECU Diagnosis (Less Common): Only as a last resort, after ruling out all other possibilities, will the mechanic consider an ECU malfunction. This often involves advanced diagnostics and specialized equipment.
- Repair and Re-Testing: Based on the diagnosis, the mechanic will replace the faulty component (relay, fuse, wiring, or fuel pump) and clear the P1541 code. The vehicle will then be re-tested to ensure the code doesn’t reappear and the engine starts and runs correctly.
Preventing Future Issues
While you can’t completely prevent electrical failures, taking preventative measures can help minimize the risk:
- Regular Maintenance: Adhere to the manufacturer’s recommended maintenance schedule. This includes checking and replacing fuses and relays as needed.
- Protecting Wiring: Inspect wiring harnesses periodically for damage or wear. Securely route wiring to prevent chafing or exposure to the elements.
- Quality Parts: When replacing components, use high-quality, OE-equivalent parts.
- Address Issues Promptly: Don’t ignore the check engine light. Addressing issues quickly can prevent minor problems from escalating into costly repairs.
Conclusion: Troubleshooting the P1541 Code in Your Seat Leon
The P1541 code in your Seat Leon indicates a problem with the fuel pump relay circuit. While the root cause can vary, the most common solution involves replacing the fuel pump relay. A skilled mechanic will follow a systematic diagnostic process, including visual inspections, electrical tests, and potentially fuel pump testing, to pinpoint the exact cause and implement the correct repair. By understanding the code and the diagnostic process, you can be better equipped to discuss the issue with your mechanic and ensure a proper fix for your Seat Leon.
Frequently Asked Questions (FAQs)
1. Can I drive my Seat Leon with the P1541 code?
It’s generally not recommended to drive the vehicle with the P1541 code, especially if the engine is not starting or stalling. The fuel pump provides the fuel needed to run the engine. Driving with a faulty fuel pump circuit could lead to the vehicle stalling in traffic, causing potential safety hazards, or causing further damage to the engine.
2. How much does it cost to fix the P1541 code?
The cost can vary depending on the specific issue. Replacing the fuel pump relay is the least expensive fix, typically costing between $20 and $100, including parts and labor. More complex repairs, such as wiring issues or a faulty fuel pump, can be significantly more expensive, potentially ranging from $100 to $1000+ depending on the parts and labor involved.
3. Can I replace the fuel pump relay myself?
Yes, replacing the fuel pump relay is a relatively simple task that many DIYers can handle. Locate the relay (usually in the fuse box), remove the old one, and install a new one. However, if you are not comfortable working with electrical components, it’s best to have a qualified mechanic perform the repair.
4. What if replacing the fuel pump relay doesn’t fix the P1541 code?
If replacing the relay doesn’t resolve the issue, the problem is likely more complex, such as wiring issues or a faulty fuel pump. In this case, it’s essential to have the car diagnosed by a professional mechanic to identify the root cause and perform the necessary repairs. 5. How long will it take to diagnose and fix the P1541 code?
The diagnosis and repair time can vary. Replacing the fuel pump relay is usually quick, often taking less than an hour. More complex diagnoses involving electrical testing or fuel pump replacement can take several hours, or potentially a day or two, depending on the mechanic’s workload and the availability of parts.
