Low battery
Battery level is below 20%. Connect charger soon.

Panasonic Head Unit Wiring: The Car Schematic Diagram That Fixes Every Setup
So, you’ve just upgraded your car’s audio system with a shiny new Panasonic head unit, and you’re eager to crank up the tunes. But then… the wiring. The tangled web of wires, the color codes, the potential for blown fuses… it can be enough to make even the most seasoned DIY enthusiast break a sweat. Fear not! This comprehensive guide will walk you through understanding your Panasonic head unit wiring and, more importantly, how to use the correct car schematic diagram to ensure a successful and safe installation. We’ll cover everything from identifying wires to troubleshooting common issues, equipping you with the knowledge to conquer your car audio project.
Understanding the Importance of a Wiring Diagram
Before you even touch a wire, understanding the importance of a wiring diagram is paramount. A car schematic diagram, specific to your vehicle, acts as your roadmap. It provides:
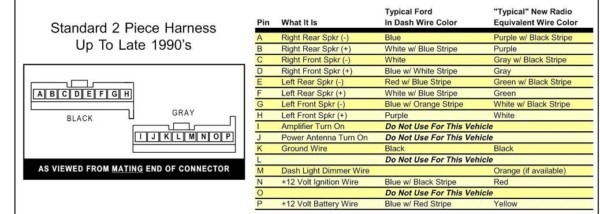
- Wire Identification: Clearly labels each wire’s function (power, ground, speakers, etc.).
- Color Codes: Deciphers the standard color coding used in your Panasonic head unit and your car’s wiring harness.
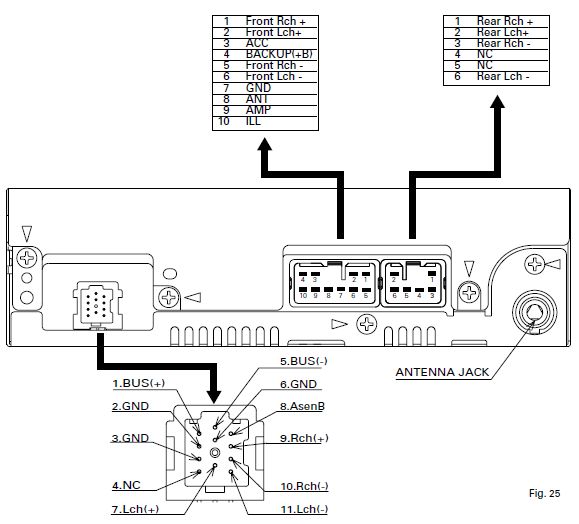
- Connector Pinouts: Shows the exact location of each wire within the connectors, preventing incorrect connections.
- Safety: Prevents accidental short circuits, which can damage your head unit, your car’s electrical system, or even cause a fire.
- Troubleshooting: Simplifies identifying and resolving problems, saving you time and frustration.
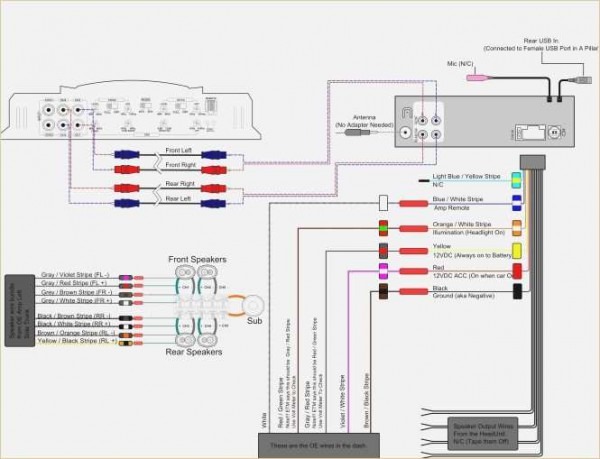
Decoding Your Panasonic Head Unit Wiring Harness
Your Panasonic head unit will come with a wiring harness, a connector designed to mate with the wires in your car. Familiarizing yourself with the following common wires is crucial:
- Power Wires:
- Constant 12V+ (Battery): Provides continuous power to the head unit for memory and clock functions. Usually yellow.
- Switched 12V+ (Ignition): Provides power only when the ignition is on. Usually red.
- Ground (Chassis): Connects to the car’s chassis for a complete electrical circuit. Usually black.
- Speaker Wires:
- Front Left (+) & (-): Typically white (+), white/black (-)
- Front Right (+) & (-): Typically gray (+), gray/black (-)
- Rear Left (+) & (-): Typically green (+), green/black (-)
- Rear Right (+) & (-): Typically purple (+), purple/black (-)
- Other Important Wires:
- Antenna Control (Power Antenna): Controls the power antenna (if equipped). Usually blue.
- Illumination: Controls the head unit’s display illumination based on the car’s lights. Usually orange.
- Remote Turn-On (Amplifier Control): Sends a signal to turn on an external amplifier. Usually blue/white.
Important Note: Wire colors can vary depending on the specific Panasonic model and your car’s make and model. Always consult the wiring diagram for your specific head unit and vehicle.
Finding the Correct Car Schematic Diagram
Locating the correct wiring diagram for your car is the next critical step. Here’s how:
- Vehicle’s Service Manual: This is the most reliable source. It provides detailed diagrams specific to your car’s year, make, and model.
- Online Resources: Websites like WiringDiagrams21.com, The12volt.com, and many others offer wiring diagrams for various vehicles. Use your car’s year, make, and model to search.
- Professional Installation Guides: Many head unit manufacturers provide installation guides that include general wiring information and diagrams.
- Local Auto Parts Store: Employees at auto parts stores can sometimes provide or point you towards the correct diagram for your vehicle.
Pro Tip: Before starting, take pictures of your car’s existing wiring harness and connectors. This can be invaluable if you get confused during the installation process.
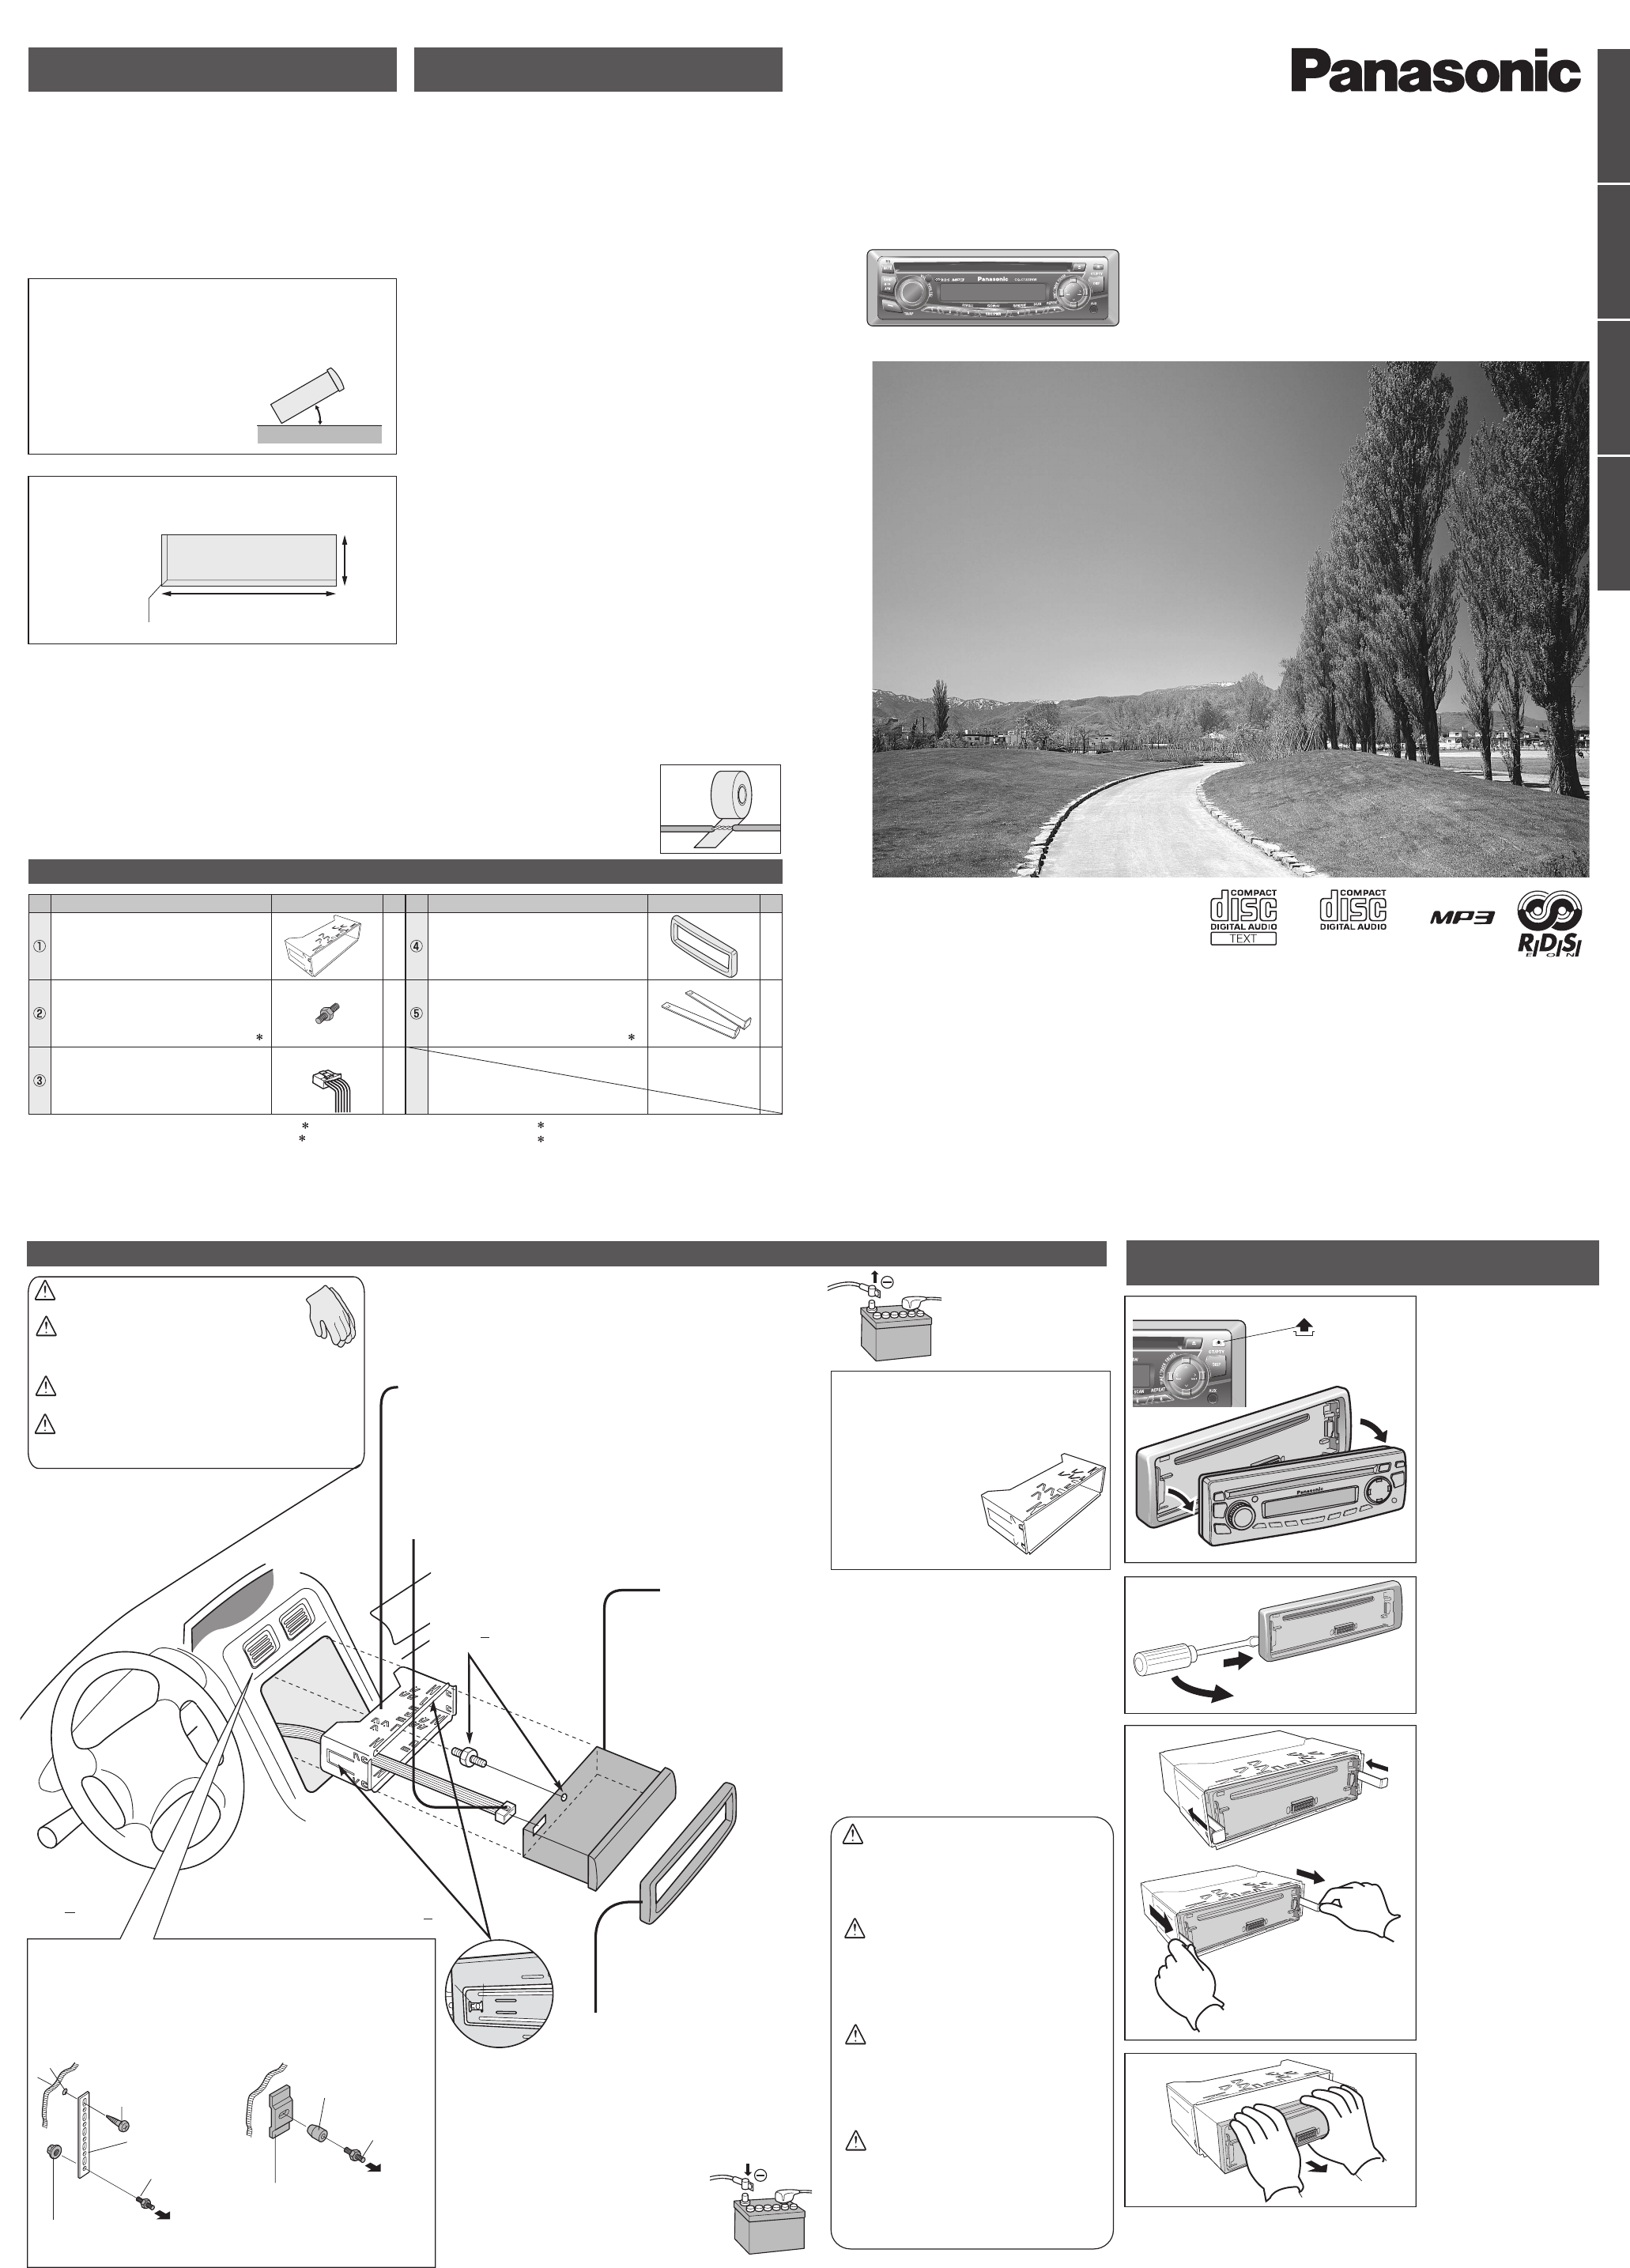
Step-by-Step Installation Guide: Wiring Your Panasonic Head Unit
Once you have your wiring diagrams, follow these steps:
- Disconnect the Battery: This crucial safety step prevents accidental short circuits.
- Identify the Wires: Using your car’s and Panasonic head unit’s wiring diagrams, identify each wire’s function.
- Match the Wires: Connect the corresponding wires from your car’s harness to the Panasonic head unit’s harness. You can use:
- Wire Connectors/Butt Connectors: These are the easiest to use and provide a secure connection.
- Soldering: Offers the most reliable and secure connection but requires soldering skills.
- Crimping: Use a crimping tool to create a strong connection.
- Connect the Speaker Wires: Ensure you connect the speaker wires to the correct channels (front left, front right, rear left, rear right) and observe the polarity (+ and -) to avoid sound issues.
- Connect the Antenna: Connect the antenna wire to the appropriate antenna port on the back of the head unit.
- Connect the Remote Turn-On Wire (if using an amplifier): Connect the remote turn-on wire from the head unit to your amplifier.
- Secure the Wires: Neatly bundle and secure the wires, using zip ties or electrical tape, to prevent them from interfering with other components.
- Test the System: Reconnect the battery and test the head unit’s functionality. Check for sound from all speakers, antenna reception, and any other features.
- Troubleshooting: If the head unit doesn’t work, review your wiring diagram and double-check all connections. Consult your car’s manual or online resources for specific troubleshooting tips.
- Final Installation: Once everything works correctly, install the head unit into the dashboard.
Troubleshooting Common Wiring Issues
Even with careful planning, problems can arise. Here are some common issues and their solutions:
- Head Unit Doesn’t Turn On:
- Check the Fuse: First, check the fuse in the head unit and the fuse in your car’s fuse box.
- Power and Ground Connections: Verify the constant 12V+ and ground connections.
- Ignition Wire: Ensure the switched 12V+ wire is connected and receiving power when the ignition is on.
- No Sound from Speakers:
- Speaker Wire Connections: Double-check the speaker wire connections and polarity (+/-).
- Speaker Impedance: Ensure the speaker impedance matches the head unit’s specifications.
- Fader/Balance Settings: Check the fader and balance settings on the head unit.
- Poor Sound Quality:
- Speaker Placement: Ensure speakers are correctly positioned and not obstructed.
- Speaker Quality: Ensure the speakers themselves are in good condition.
- Wiring Interference: Ensure the wiring isn’t near sources of interference.
- Radio Reception Issues:
- Antenna Connection: Check the antenna connection to the head unit.
- Antenna Condition: Inspect the antenna for damage or corrosion.
- Antenna Placement: Ensure the antenna is properly mounted.
Conclusion: Enjoy the Sound!
Wiring a Panasonic head unit can seem daunting, but with the right knowledge and the proper car schematic diagram, it’s a manageable project. By understanding your head unit’s wiring, utilizing the correct diagram, and following the steps outlined above, you can successfully install your new audio system and enjoy a significantly improved listening experience. Remember to always prioritize safety, double-check your connections, and don’t hesitate to seek professional help if you are unsure. Happy listening!
Frequently Asked Questions (FAQs)
1. Where can I find the wiring diagram for my car?
The best place to find a wiring diagram is in your car’s service manual. You can also find them online from websites like WiringDiagrams21.com or The12volt.com.
2. What if the wire colors in my car don’t match the Panasonic head unit’s wiring diagram?
Always prioritize the car’s wiring diagram. The Panasonic diagram will show the wire functions but the car’s diagram will show what your car has.
3. Can I install a head unit myself, or should I hire a professional?
If you are comfortable working with electronics and following instructions, you can install the head unit yourself. However, if you are unsure about any aspect of the installation, it’s always best to consult a professional.
4. What tools do I need for this installation?
You will need a wire stripper/crimper, wire connectors (or soldering equipment), electrical tape, zip ties, a Phillips head screwdriver and a flathead screwdriver. You might also need a dash removal tool.
5. What if I accidentally reverse the polarity of the speaker wires?
Reversing the polarity of the speaker wires will cause the speakers to play out of phase, which will result in a loss of bass and a generally muffled sound. You can fix this by swapping the positive and negative wires for each speaker.
